- Install Zabbix Repository
Zabbix officially provide the debian package for configuring PPA on Ubuntu systems. Download the package by running the following command in your terminal:
root@XSHQSMon01:~# wget https://repo.zabbix.com/zabbix/6.5/ubuntu/pool/main/z/zabbix-release/zabbix-release_6.5-1%2Bubuntu22.04_all.deb
Install the Zabbix repository package:
root@XSHQSMon01:~# dpkg -i zabbix-release_6.5-1+ubuntu22.04_all.deb
Update your package list:
apt-get update
- Install Zabbix server and necessary packages
Use the following command to install the Zabbix server, frontend, Apache configuration, SQL scripts, and agent packages:
sudo apt install zabbix-server-mysql zabbix-agent zabbix-apache-conf zabbix-sql-scripts zabbix-frontend-php - Step 3: Install mysql database server and initiate configuration
root@XSHQSMon01:~# apt-get install mysql-server
root@XSHQSMon01:~# mysql_secure_installation
- Step 4: Create Initial Database
Log in to MySQL as the root user:
mysql -u root -p Create the Zabbix database and set the character set and collation:
| mysql> create database zabbix character set utf8mb4 collate utf8mb4_bin; |
Create a new Zabbix user and set a password:
| mysql> create user zabbix@localhost identified by ‘password’; |
Grant all privileges on the Zabbix database to the Zabbix user:
| mysql> grant all privileges on zabbix.* to zabbix@localhost; |
Enable the log_bin_trust_function_creators option:
| mysql> set global log_bin_trust_function_creators = 1; |
Exit MySQL:
| mysql> quit; |
Import the initial schema and data to the Zabbix database on the Zabbix server host. Enter the password you created earlier when prompted:
| zcat /usr/share/zabbix-sql-scripts/mysql/server.sql.gz | mysql –default-character-set=utf8mb4 -uzabbix -p zabbix |
Disable the `log_bin_trust_function_creators` option after importing the database schema:
mysql -uroot -p
mysql> set global log_bin_trust_function_creators = 0; mysql> quit; |
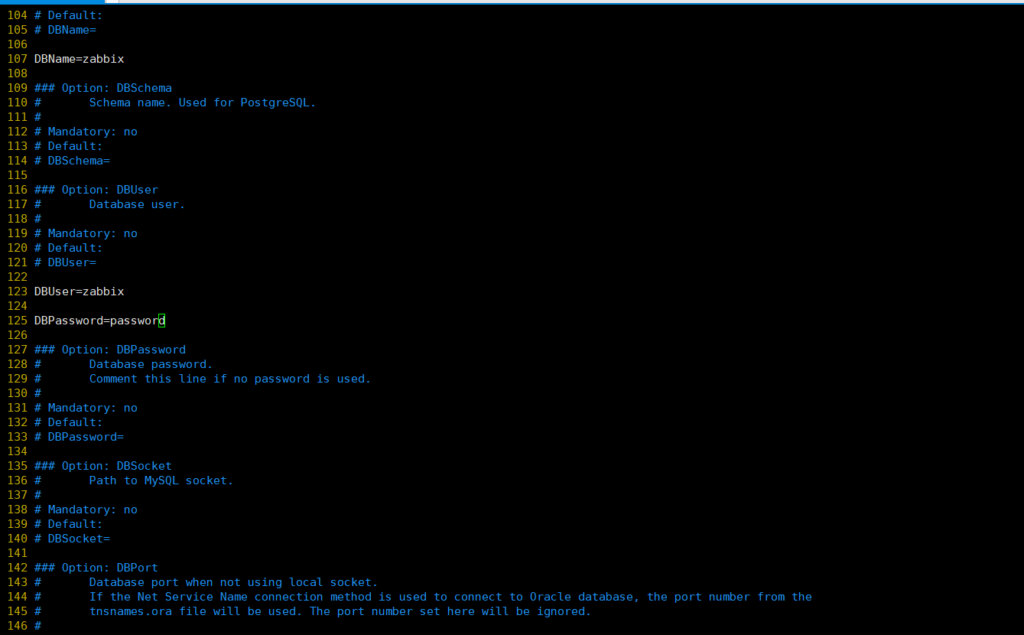
- Step 5: Configure the database for the Zabbix server
Edit the Zabbix server configuration (`/etc/zabbix/zabbix_server.conf`) file to set the database password with `DBPassword` variable as below:
| DBPassword=password |
- Step 5: Start Zabbix server and agent processes
Restart the Zabbix server, agent, and Apache2 services:
| root@XSHQSMon01:~# systemctl restart zabbix-server zabbix-agent apache2 |
- Step 6: Access the Zabbix web interface
You can access the Zabbix web interface by navigating to the following URL in your browser:
| http://10.88.60.130/zabbix |
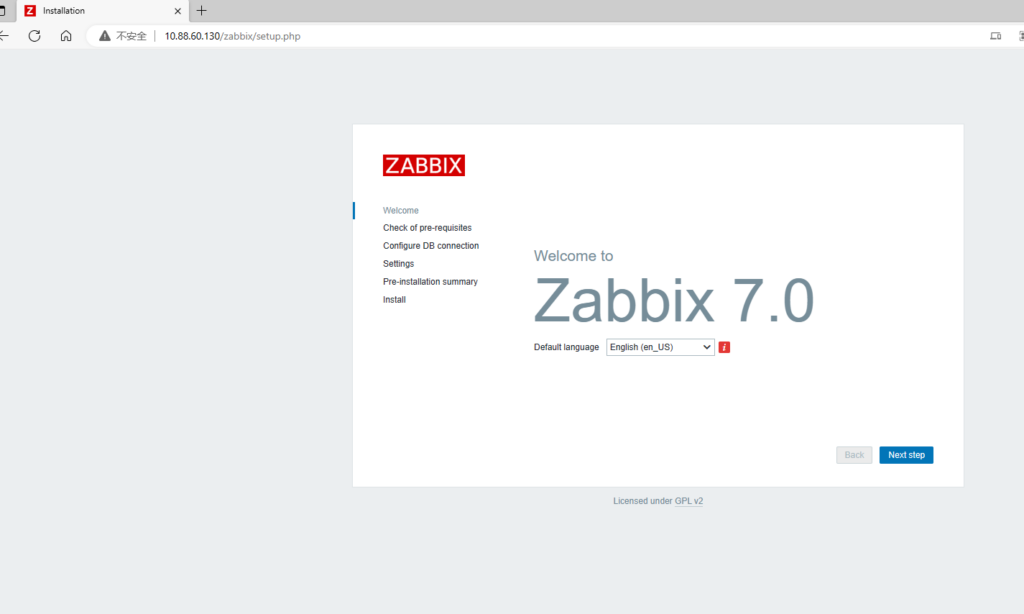
Replace “host” with your server’s hostname or IP address. Follow the on-screen instructions to complete the Zabbix setup.
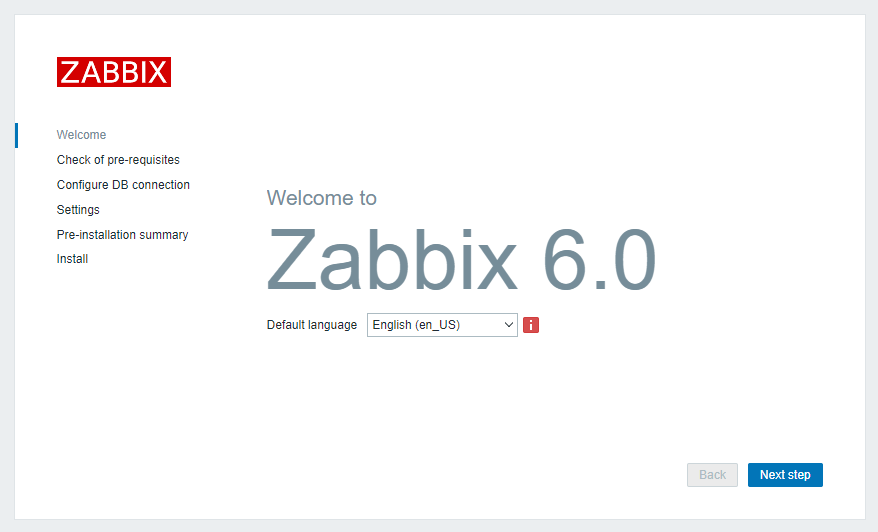
- In the first step, you will see a welcome message. This page will also show you the Zabbix version is being installed. Click the “Next step” button to continue:
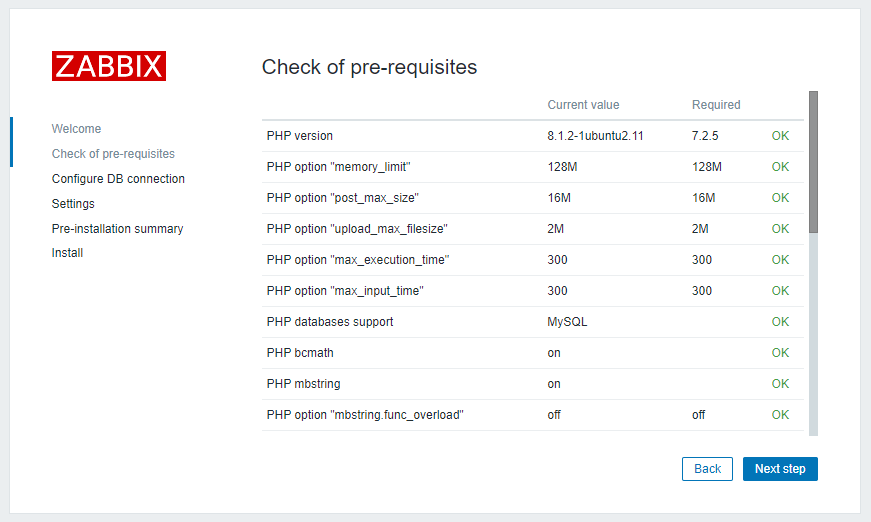
- In this step the installer will check for pre-requisites. Which will check if all the required packages and PHP modules are properly configured. If you see any error message, fix it before going to next. Then click the “Next step” button to continue:
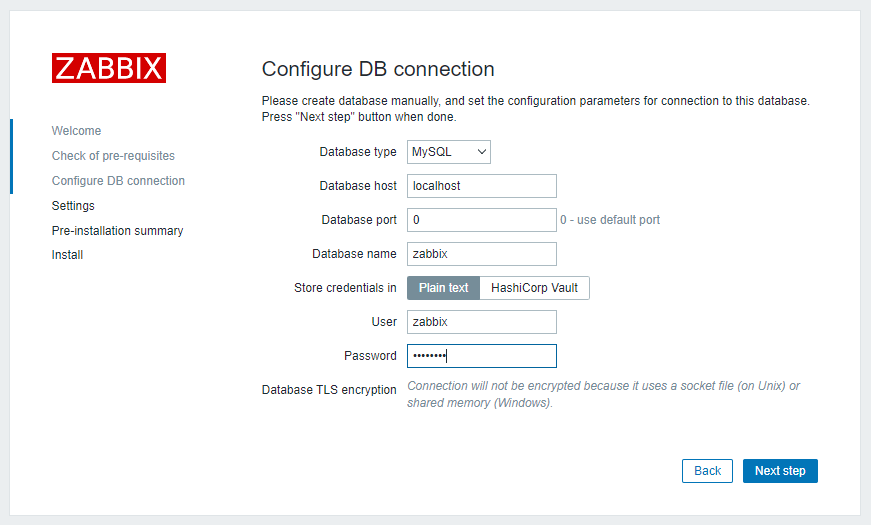
- Configure the DB settings here created above in this article. Make sure all the settings are correctly filled. Then click the “Next step” button to continue:
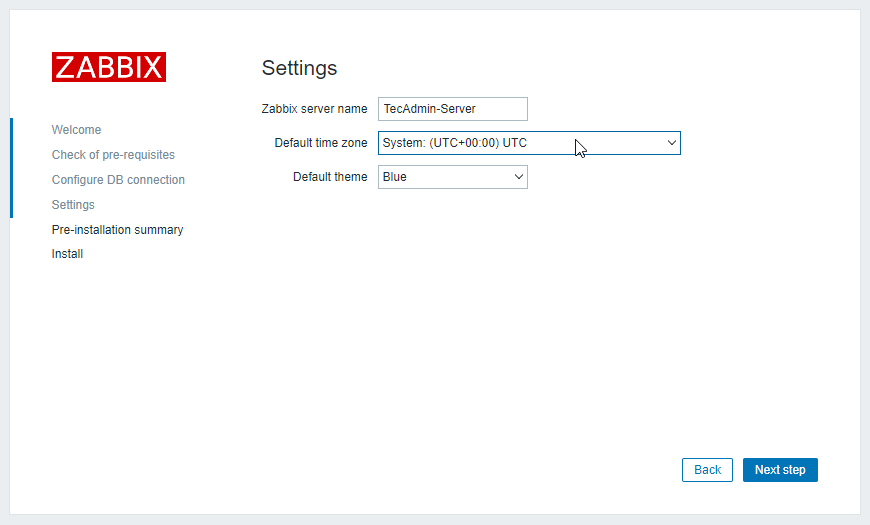
- In this step, set a meaning full name for your Zabbix server, select proper timezone and default theme for your Zabbix dashboard. Then click the “Next step” button to continue:
- On successful installation, you will receive a message like below screenshot. Click “Finish” button to go to login screen:

- You have a running Zabbix server with a web frontend. Use below default Zabbix admin login details
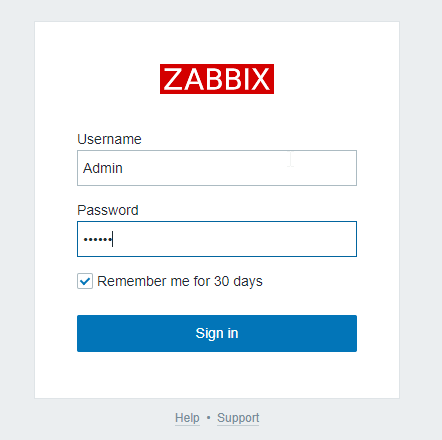
| Username: Admin Password: zabbix |
7. After successful authentication, you will be redirected to Admin dashboard. Here you can add new hosts and services for monitoring.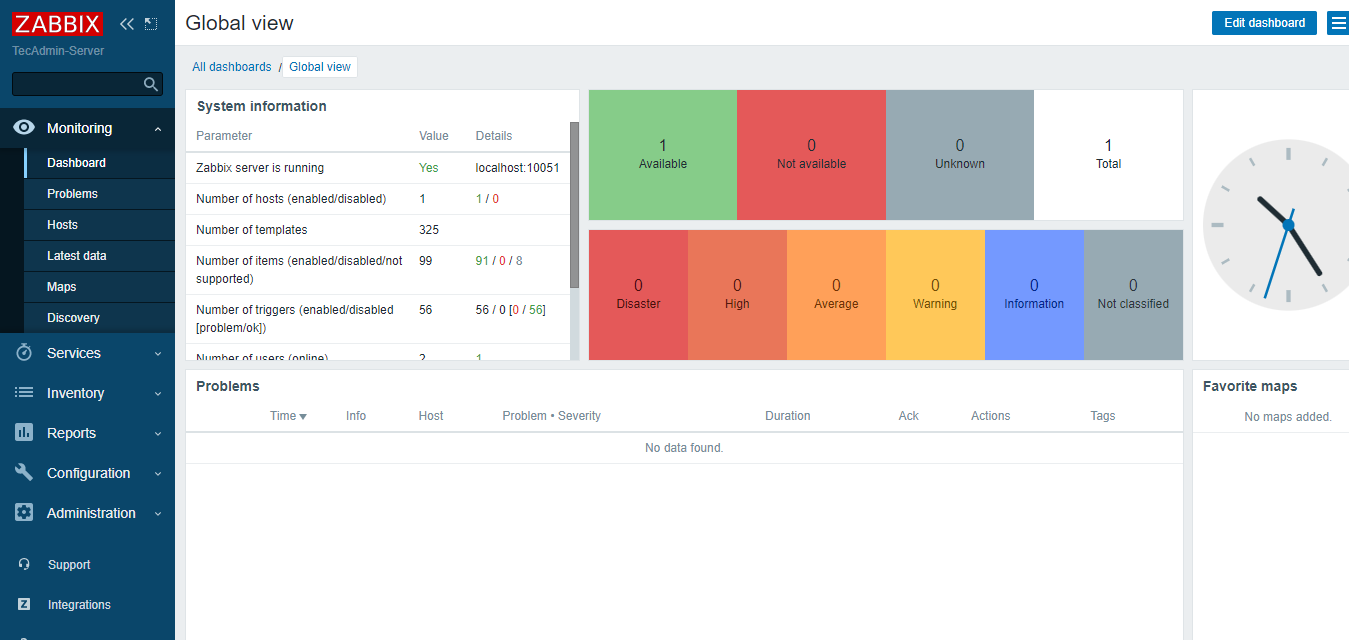 Zabbix Dashboard
Conclusion
Congratulations! You have now successfully installed and configured Zabbix on your Ubuntu 22.04 server. With this powerful monitoring tool in place, you can now monitor the performance, availability, and overall health of your IT infrastructure more effectively. By leveraging Zabbix’s extensive features and capabilities, you can proactively identify and address potential issues, optimize your systems and applications, and ensure the highest level of service quality for your end-users. As you continue to explore and familiarize yourself with Zabbix, you will find that it offers a wide range of customization options and advanced functionality, allowing you to tailor the monitoring solution to meet your organization’s unique needs. Happy monitoring!